Showing posts with label Hardware. Show all posts

Wednesday, February 11, 2015


To use all the space of your 3TB HDD you will need a disk of 64 bit Windows 7 or up. The 32 bit version of operating system uses - MBR (Master Boot Record) type partition system which can partition up to 2TB. That is why the remaining 746GB stays unallocated. The 64 bit Windows uses GPT (GUID Partition Table) type partition system which can handle upto 9.4ZB space.

(Don't forget to Backup your important data first).


For GPT type partitioning:-


1. You'll need a Motherboard that supports UEFI (Unified Extensible Firmware Interface).


2. Enter Motherboard's settings (BIOS) by pressing F2/Delete key.

3. Enable UEFI Mode instead of Legacy.


4. Save and Exit Motherboard's settings (BIOS).

5. Boot 64 Bit Windows disk in UEFI Mode.


6. In the partitioning window if you have any MBR type partition delete them.


7. After deletion create new partitions and install Windows.


Sunday, January 25, 2015


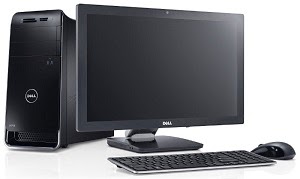
In my previous posts I have explained the ways of assembling the internal parts of a Desktop PC. So now the time has come to explain how to make the connections between the external devices:


1. Grab the VGA/DVI/HDMI Cord of the Monitor and connect it to the VGA/DVI/HDMI port of either the Motherboard or the Graphics Card.


2. Grab the USB/PS2 cable of the Keyboard and push it in the USB/PS2 port of the Motherboard.


3. Grab the USB/PS2 cable of the Mouse and push it in the USB/PS2 port of the Motherboard.


4. Grab the Speaker and Headphone jacks and connect them with the audio ports.


5. Get a Power Cord and connect its one end with the port behind Power Supply.


6. Connect the other end with a UPS.


7. Take the Monitor Power Cord and connect it to the UPS.

8. Connect the UPS power cable with the main electricity line.


9. Done, the Computer can start now.


Friday, January 23, 2015


Desktop Computer Assembling is easy. It usually takes up to 30 minutes to assemble a Complete Desktop PC. In my other articles I have written about how to install various components of a Desktop PC. Today I am gonna take you through the steps of Assembling a Complete Desktop PC:


10. Install a Graphics Card (Optional).


12. Close the Case.


12. Start the Computer.

13. Install an Operating System (Windows, Linux, Mac etc.).

14. And finally its over.


Thursday, January 22, 2015


If you need extra USB, Ethernet (LAN) or Audio ports in your Computer than you can have them by adding different types of PCI Cards in your PC. If you want to watch Television in your PC than you can add a PCI TV Card to your PC. PCI Cards connects to the PCI Slots of the Computer Motherboard. Remember PCI and PCI Express slots are different. PCI Express slots are used by Graphics Cards. Click here to know about how to install a Graphics Card in a PCI Express slot. Here is how to install a PCI card in your Desktop Computer:


1. Collect the type of card you need.

2. Locate the PCI Slots of your Motherboard.


3. Remove the barriers of the PC Case beside the slot you'll be using.

4. Align the card properly with the slot.

5. Insert the Card in the slot.

6. Attach the Card with the PC Case with a screw.

7. Done.


A Computer can process Graphical Data even without a Graphics Card. Intel and AMD Processors (CPU) have the capability of processing certain amount of Graphical Data. But for high level Graphical Performance a GPU is needed. If you want to use your PC for playing high quality modern day Videogames or Graphical Animations then go ahead and buy a GPU from AMD or nVIDIA. The Graphics Cards connect to the PCI Express Slot of the Computer Motherboard. Remember that PCI Express and PCI Slots are different. Click here to know about using PCI slots. Here's an explanation of how to connect a GPU in a Desktop PC Motherboard:


1. Buy a Graphics Card.

2. Locate the PCI Express x16 Slot of the Motherboard.


3. Remove the barriers of the Computer Case beside the slot.

4. Grab and align the GPU properly with the slot.

5. Insert the GPU in the slot.

6. Attach the GPU with the PC Case with a screw.

7. Done.