Showing posts with label How To. Show all posts

Wednesday, March 30, 2016


To change the default quality of video -


1) Login to your facebook account

2) Visit this link - https://www.facebook.com/settings/?tab=videos

3) Click on the dropdown menu and select your preferred quality


4) For slow internet connections change it to - SD Only -but if you are a video collector and you want to download high quality video then select - HD if available -option

5) Done

Sunday, June 21, 2015


Taking a screenshot of your personal computer is quite easy. The method of taking a screenshot changes depending on which operating system you are using. This article shall demonstrate the various methods of taking screenshots on different OS platforms:

How to take a screenshot on all the Windows or Linux versions:

1. Press "Print Screen" to capture the screen.

2. Open an Photo or Graphics editor (i.e. Photoshop, MS Paint etc.).

3. Paste the captured screen image on the editor.

4. You can edit the image you want.

5. Click "Save" from the "File" menu or press "Ctrl+s".

6. Give the file a suitable name and format.

7. Click "Ok" to save the file.

How to take a screenshot on Windows 7 or higher Windows versions:

1. Open the "Windows Snipping Tool".

2. Click on "New".

3. Click and hold your mouse button and drag it over the area you want to capture.

4. You can edit the image you want.

5. Click "Save As" from the "File" menu or press "Ctrl+s".

6. Give the file a suitable name and format.

7. Click "Ok" to save the file.

How to take a screenshot on your Apple Mac:

A. To get the whole screenshot on your desktop as a PNG file:

1. Press "Command+Shift+3".

2. Done, you have a PNG file on your desktop.

B. Taking a screenshot of part of your screen:

1. Press "Command+Shift+4".

2. Click and hold your mouse button and drag it over the area you want to capture.

3. The captured screenshot will be on your desktop.

C. Taking a Window screenshot:

1. Press "Command+Shift+4".

2. Press "Space" and your cursor will become a camera.

3. Move the camera over the window and it will glow.

4. Click and You'll get a PNG screenshot on your desktop.

D. Taking the screenshot in your clipboard instead of your desktop:

1. Press "Command+Shift+Control+4".

2. Done, you can now paste the screenshot wherever you want.


Friday, April 24, 2015


If you don't want your visitors clicking links and going away from your blog then you should try one of these.

  • Go to your posts 
  • Click edit
  • Click on the link you want your visitors to open in new tab
  • Click "Change"
  • There is a check box that says - "Open this link in a new window" - Mark this check box 
  • Click and Update post
  • Done

OR

  • Go to your Template
  • Click "Edit HTML"
  • Press Ctrl + F and search for <head> tag
  • Now copy this code - <base target="_blank"/>
  • Put it next to your <head> tag
  • Done

TAG: How To Make Blogger Links Open In New Tab

Wednesday, February 11, 2015


To use all the space of your 3TB HDD you will need a disk of 64 bit Windows 7 or up. The 32 bit version of operating system uses - MBR (Master Boot Record) type partition system which can partition up to 2TB. That is why the remaining 746GB stays unallocated. The 64 bit Windows uses GPT (GUID Partition Table) type partition system which can handle upto 9.4ZB space.

(Don't forget to Backup your important data first).


For GPT type partitioning:-


1. You'll need a Motherboard that supports UEFI (Unified Extensible Firmware Interface).


2. Enter Motherboard's settings (BIOS) by pressing F2/Delete key.

3. Enable UEFI Mode instead of Legacy.


4. Save and Exit Motherboard's settings (BIOS).

5. Boot 64 Bit Windows disk in UEFI Mode.


6. In the partitioning window if you have any MBR type partition delete them.


7. After deletion create new partitions and install Windows.


Thursday, February 5, 2015


How To Fix Google Webmaster Tools Structured Data Postid Errors of a Blogger/Blogspot Blog?


When you add a Blogger/ Blogspot site in the Google Webmaster Tools It may show a lot of errors in Search Appearance - Structured Data. If your errors are because of BlogPost then you can fix them by following the steps bellow:

1. Log in to Blogger.

2. Select your Blog.

3. Go to Template.

4. Click on Edit HTML.

5. Inside the code box press Ctrl+F.

6. Search for itemprop='blogPost'.

7. Delete itemprop='blogPost'.

8. Click Save Template.

9. Done.


How To Fix Google Webmaster Tools Structured Data Postid Errors of a Blogger/Blogspot Blog?


When you add a Blogger/ Blogspot site in the Google Webmaster Tools It may show a lot of errors in Search Appearance - Structured Data. If your errors are because of Postid then you can fix them by following the steps bellow:

1. Log in to Blogger.

2. Select your Blog.

3. Go to Template.

4. Click on Edit HTML.

5. Inside the code box press Ctrl+F.

6. Search for itemprop='postid'.

7. You'll find it twice.

8. Delete both the itemprop='postid'.

9. Click Save Template.

10. Done.


How To Fix Google Webmaster Tools Structured Data Blogid Errors of a Blogger/Blogspot Blog?


When you add a Blogger/ Blogspot site in the Google Webmaster Tools It may show a lot of errors in Search Appearance - Structured Data. If your errors are because of Blogid then you can fix them by following the steps bellow:

1. Log in to Blogger.

2. Select your Blog.

3. Go to Template.

4. Click on Edit HTML.

5. Inside the code box press Ctrl+F.

6. Search for itemprop='blogid'.

7. You'll find it twice.

8. Delete both the itemprop='blogid'.

9. Click Save Template.

10. Done.


Wednesday, February 4, 2015


How To Fix Google Webmaster Tools Structured Data Hatom Missing: Author Errors of a Blogger/Blogspot Blog?


When you add a Blogger/ Blogspot site in the Google Webmaster Tools It may show a lot of errors in Search Appearance - Structured Data. If your errors are because of hatom (markup: microformats.org) Missing: Author then you can fix them by following the steps bellow:

1. Log in to Blogger.

2. Select your Blog.

3. Go to Template.

4. Click on Edit HTML.

5. Inside the code box press Ctrl+F.

6. Search for
span class='post-author vcard'
.


7. You'll Find:
 
                <b:if cond="data:top.showAuthor"> 
                  <b:if cond="data:post.authorProfileUrl"> 
                    <span class="fn"> 
                      <a expr:href="data:post.authorProfileUrl" href="https://www.blogger.com/null" rel="author" title="author profile"> 
                        <data:post author=""> 
                      </data:post></a> 
                    </span> 
                  <b:else> 
                    <span class="fn"><data:post author=""></data:post></span> 
                  </b:else></b:if> 
                </b:if> 
              

8. Replace the codes with the following codes:
<span class="post-author vcard" itemscope="itemscope" itemtype="http://schema.org/Person"> 
                <b:if cond="data:top.showAuthor"> 
                  <b:if cond="data:post.authorProfileUrl"> 
                    <span class="fn author"> 
                      <a expr:href="data:post.authorProfileUrl" href="https://www.blogger.com/null" rel="author" title="author profile"> 
                        <span itemprop="name"><data:post author=""></data:post></span> 
                      </a> 
                    </span> 
                  <b:else> 
                    <span class="fn author"><span itemprop="name"><data:post author=""></data:post></span></span> 
                  </b:else></b:if> 
                </b:if> 
              </span>

9. If you can't find the span section then paste the above codes in a section where you want the author name to appear.

10. Click Save Template.

11. Click on a error from Webmaster Tools.

12. From the dialog box click Test Live Data.

13. Done.


How To Fix Google Webmaster Tools Structured Data Hatom Missing: Updated Errors of a Blogger/Blogspot Blog?


When you add a Blogger/ Blogspot site in the Google Webmaster Tools It may show a lot of errors in Search Appearance - Structured Data. If your errors are because of hatom (markup: microformats.org) Missing: Updated then you can fix them by following the steps bellow:

1. Log in to Blogger.

2. Select your Blog.

3. Go to Template.

4. Click on Edit HTML.

5. Inside the code box press Ctrl+F.

6. Search for data:post.timestamp/.

7. You'll find this in two places:

<a class="timestamp-link" expr:href="data:post.url" href="https://www.blogger.com/null" rel="bookmark" title="permanent link"><abbr class="published" expr:title="data:post.timestampISO8601"><span style="font-family: &quot;verdana&quot; , sans-serif;"><data:post .timestamp=""></data:post></span></abbr></a>


8. Replace them with:

<a class="timestamp-link" expr:href="data:post.url" href="https://www.blogger.com/null" rel="bookmark" title="permanent link"><abbr class="published" expr:title="data:post.timestampISO8601"><data:post .timestamp=""></data:post></abbr></a>

9. Remember to replace in both places.

10. Click Save Template.


11. Click on a error from Webmaster Tools.

12. From the dialog box click Test Live Data.

13. Done.


How To Fix Google Webmaster Tools Structured Data Image_url Errors of a Blogger/Blogspot Blog?


When you add a Blogger/ Blogspot site in the Google Webmaster Tools It may show a lot of errors in Search Appearance - Structured Data. If your errors are because of Image_url then you can fix them by following the steps bellow:

1. Log in to Blogger.

2. Select your Blog.

3. Go to Template.

4. Click on Edit HTML.

5. Inside the code box press Ctrl+F.

6. Search for itemprop='image_url'.

7. You'll find it in multiple places.

8. Change all of them to itemprop='image'.

9. Click Save Template.

10. Done.


Sunday, January 25, 2015


In my previous posts I have explained the ways of assembling the internal parts of a Desktop PC. So now the time has come to explain how to make the connections between the external devices:


1. Grab the VGA/DVI/HDMI Cord of the Monitor and connect it to the VGA/DVI/HDMI port of either the Motherboard or the Graphics Card.


2. Grab the USB/PS2 cable of the Keyboard and push it in the USB/PS2 port of the Motherboard.


3. Grab the USB/PS2 cable of the Mouse and push it in the USB/PS2 port of the Motherboard.


4. Grab the Speaker and Headphone jacks and connect them with the audio ports.


5. Get a Power Cord and connect its one end with the port behind Power Supply.


6. Connect the other end with a UPS.


7. Take the Monitor Power Cord and connect it to the UPS.

8. Connect the UPS power cable with the main electricity line.


9. Done, the Computer can start now.


Friday, January 23, 2015


Desktop Computer Assembling is easy. It usually takes up to 30 minutes to assemble a Complete Desktop PC. In my other articles I have written about how to install various components of a Desktop PC. Today I am gonna take you through the steps of Assembling a Complete Desktop PC:


10. Install a Graphics Card (Optional).


12. Close the Case.


12. Start the Computer.

13. Install an Operating System (Windows, Linux, Mac etc.).

14. And finally its over.


Thursday, January 22, 2015


If you need extra USB, Ethernet (LAN) or Audio ports in your Computer than you can have them by adding different types of PCI Cards in your PC. If you want to watch Television in your PC than you can add a PCI TV Card to your PC. PCI Cards connects to the PCI Slots of the Computer Motherboard. Remember PCI and PCI Express slots are different. PCI Express slots are used by Graphics Cards. Click here to know about how to install a Graphics Card in a PCI Express slot. Here is how to install a PCI card in your Desktop Computer:


1. Collect the type of card you need.

2. Locate the PCI Slots of your Motherboard.


3. Remove the barriers of the PC Case beside the slot you'll be using.

4. Align the card properly with the slot.

5. Insert the Card in the slot.

6. Attach the Card with the PC Case with a screw.

7. Done.


A Computer can process Graphical Data even without a Graphics Card. Intel and AMD Processors (CPU) have the capability of processing certain amount of Graphical Data. But for high level Graphical Performance a GPU is needed. If you want to use your PC for playing high quality modern day Videogames or Graphical Animations then go ahead and buy a GPU from AMD or nVIDIA. The Graphics Cards connect to the PCI Express Slot of the Computer Motherboard. Remember that PCI Express and PCI Slots are different. Click here to know about using PCI slots. Here's an explanation of how to connect a GPU in a Desktop PC Motherboard:


1. Buy a Graphics Card.

2. Locate the PCI Express x16 Slot of the Motherboard.


3. Remove the barriers of the Computer Case beside the slot.

4. Grab and align the GPU properly with the slot.

5. Insert the GPU in the slot.

6. Attach the GPU with the PC Case with a screw.

7. Done.


Wednesday, January 21, 2015


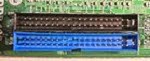
Hard Disk Drives are used to store various types of data in them. There are Internal and External Hard Disks. External Hard Disks just connect to the USB ports like Pen drives. Internal Hard Disks connect to the Motherboard. Like Optical Drives Internal Hard Disks support PATA (Parallel AT Attachment)/IDE (Integrated Drive Electronics) or SATA (Serial AT Attachment) ports. PATA/IDE technology is now ancient, so the modern day drives use SATA ports instead of PATA/IDE. Only if you have a HDD which was made before the year 2003 then you'll need to connect that drive to the big fat PATA/IDE port. This article will explain the ways of connecting a Hard Disk Drive to a Desktop PC.


Connecting an Optical Disk Drive Using PATA/IDE Port:


1. Detect the PATA/IDE port.


2. Get a PATA/IDE cable.


3. Insert the drive into the Computer Case.

4. Attach it firmly with the case with two screws.

5. Connect One end of the cable to the drive and the other end to the Motherboard.

6. Grab a Power Cable of the Power Supply.


7. Connect it with the power port of the Hard Drive.

Connecting an Optical Disk Drive Via SATA Port:

1. Insert the drive in the PC case.

2. Attach it with the case with screws.

3. Find the SATA Ports on the Motherboard.


4. Get a SATA Data Cable.


5. Connect One end of the cable to the drive and the other end to the Motherboard.

6. Get a SATA Power Cable.


7. Connect its fat end to a power cable from the power supply.

8. Connect the thin end with the drive.

9. Done.


Tuesday, January 20, 2015


The Optical Disk Drives are used to read or write various types of data to Optical Disks such as CD, DVD, Blu-ray etc. Optical Drives need to be connected to the PATA (Parallel AT Attachment)/IDE (Integrated Drive Electronics) port or the SATA (Serial AT Attachment) ports. PATA/IDE technology is now ancient, so the modern day drives use SATA ports instead of PATA/IDE. Only if you have a drive which was made before the year 2003 then you'll need to connect that drive to the big fat PATA/IDE port. This article will explain the ways of connecting a Opticle Disk Drive to a Desktop PC.


Connecting an Optical Disk Drive Using PATA/IDE Port:


1. Detect the PATA/IDE port.


2. Get a PATA/IDE cable.


3. Insert the drive into the Computer Case.

4. Attach it firmly with the case with two screws.

5. Connect One end of the cable to the drive and the other end to the Motherboard.

6. Grab a Power Cable of the Power Supply.


7. Connect it with the power port of the Optical Drive.

Connecting an Optical Disk Drive Via SATA Port:

1. Insert the drive in the PC case.

2. Attach it with the case with screws.

3. Find the SATA Ports on the Motherboard.


4. Get a SATA Data Cable.


5. Connect One end of the cable to the drive and the other end to the Motherboard.

6. Get a SATA Power Cable.


7. Connect its fat end to a power cable from the power supply.

8. Connect the thin end with the drive.

9. Done.


Monday, January 19, 2015


Every Computer Case comes with a front panel which includes the Power Button, Reset Button, Power LED, Hard Disk Drive LED, USB Ports, Audio Ports etc. This panel needs to be connected with the Motherboard in order to make the components work. This article explains the way of connecting the front panel with the motherboard:


1. Find the Switch, LED, USB and Audio port pins on the Motherboard.


2. The connection sequences are written beside the ports in tiny letters. If you can't see them then follow the diagrams below.


3. Use the above diagram to connect the connectors of the Power Switch, Reset Switch, Power LED and HDD LED to the the pins (The Names are written on each particular connector).


4. Use the above diagram to connect the USB Port connectors.


5. Use the above diagram to connect the Audio Panel connectors.

6. Be careful about not breaking any pin while connecting.

7. Done.


Sunday, January 18, 2015


The components of a Desktop Computer are interconnected via Motherboard. The Motherboard is attached into a Case. This article will explain how to install a Motherboard into a PC Case:


1. Open the Case.

2. Break and remove the fake I/O panel shields from the metal plate behind the case.

3. Screw the standoffs in to attach them with the case.

4. Insert the Motherboard in the Case.

5. Place it on the standoffs.

6. Push the Motherboard sideways to put the I/O panel out through the holes of the metal plate.

7. Attach the Motherboard firmly with screws but don't overtight them.


9. Connect the Front Panel Power Switch, Reset Switch, Power LED, HDD LED, Audio Panel and USB Ports with the Motherboard.

10. Connect the Cooling Fan of the Case with the Motherboard and Power Supply Cable.