Showing posts with label Motherboard. Show all posts

Wednesday, February 11, 2015


To use all the space of your 3TB HDD you will need a disk of 64 bit Windows 7 or up. The 32 bit version of operating system uses - MBR (Master Boot Record) type partition system which can partition up to 2TB. That is why the remaining 746GB stays unallocated. The 64 bit Windows uses GPT (GUID Partition Table) type partition system which can handle upto 9.4ZB space.

(Don't forget to Backup your important data first).


For GPT type partitioning:-


1. You'll need a Motherboard that supports UEFI (Unified Extensible Firmware Interface).


2. Enter Motherboard's settings (BIOS) by pressing F2/Delete key.

3. Enable UEFI Mode instead of Legacy.


4. Save and Exit Motherboard's settings (BIOS).

5. Boot 64 Bit Windows disk in UEFI Mode.


6. In the partitioning window if you have any MBR type partition delete them.


7. After deletion create new partitions and install Windows.


Friday, January 23, 2015


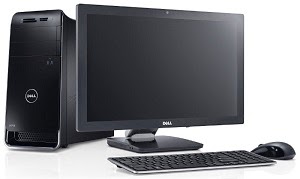
Desktop Computer Assembling is easy. It usually takes up to 30 minutes to assemble a Complete Desktop PC. In my other articles I have written about how to install various components of a Desktop PC. Today I am gonna take you through the steps of Assembling a Complete Desktop PC:


10. Install a Graphics Card (Optional).


12. Close the Case.


12. Start the Computer.

13. Install an Operating System (Windows, Linux, Mac etc.).

14. And finally its over.


Thursday, January 22, 2015


If you need extra USB, Ethernet (LAN) or Audio ports in your Computer than you can have them by adding different types of PCI Cards in your PC. If you want to watch Television in your PC than you can add a PCI TV Card to your PC. PCI Cards connects to the PCI Slots of the Computer Motherboard. Remember PCI and PCI Express slots are different. PCI Express slots are used by Graphics Cards. Click here to know about how to install a Graphics Card in a PCI Express slot. Here is how to install a PCI card in your Desktop Computer:


1. Collect the type of card you need.

2. Locate the PCI Slots of your Motherboard.


3. Remove the barriers of the PC Case beside the slot you'll be using.

4. Align the card properly with the slot.

5. Insert the Card in the slot.

6. Attach the Card with the PC Case with a screw.

7. Done.


A Computer can process Graphical Data even without a Graphics Card. Intel and AMD Processors (CPU) have the capability of processing certain amount of Graphical Data. But for high level Graphical Performance a GPU is needed. If you want to use your PC for playing high quality modern day Videogames or Graphical Animations then go ahead and buy a GPU from AMD or nVIDIA. The Graphics Cards connect to the PCI Express Slot of the Computer Motherboard. Remember that PCI Express and PCI Slots are different. Click here to know about using PCI slots. Here's an explanation of how to connect a GPU in a Desktop PC Motherboard:


1. Buy a Graphics Card.

2. Locate the PCI Express x16 Slot of the Motherboard.


3. Remove the barriers of the Computer Case beside the slot.

4. Grab and align the GPU properly with the slot.

5. Insert the GPU in the slot.

6. Attach the GPU with the PC Case with a screw.

7. Done.


Monday, January 19, 2015


Every Computer Case comes with a front panel which includes the Power Button, Reset Button, Power LED, Hard Disk Drive LED, USB Ports, Audio Ports etc. This panel needs to be connected with the Motherboard in order to make the components work. This article explains the way of connecting the front panel with the motherboard:


1. Find the Switch, LED, USB and Audio port pins on the Motherboard.


2. The connection sequences are written beside the ports in tiny letters. If you can't see them then follow the diagrams below.


3. Use the above diagram to connect the connectors of the Power Switch, Reset Switch, Power LED and HDD LED to the the pins (The Names are written on each particular connector).


4. Use the above diagram to connect the USB Port connectors.


5. Use the above diagram to connect the Audio Panel connectors.

6. Be careful about not breaking any pin while connecting.

7. Done.


Sunday, January 18, 2015


The components of a Desktop Computer are interconnected via Motherboard. The Motherboard is attached into a Case. This article will explain how to install a Motherboard into a PC Case:


1. Open the Case.

2. Break and remove the fake I/O panel shields from the metal plate behind the case.

3. Screw the standoffs in to attach them with the case.

4. Insert the Motherboard in the Case.

5. Place it on the standoffs.

6. Push the Motherboard sideways to put the I/O panel out through the holes of the metal plate.

7. Attach the Motherboard firmly with screws but don't overtight them.


9. Connect the Front Panel Power Switch, Reset Switch, Power LED, HDD LED, Audio Panel and USB Ports with the Motherboard.

10. Connect the Cooling Fan of the Case with the Motherboard and Power Supply Cable.


Saturday, January 17, 2015


RAM (Random Access Memory) works as the runtime memory of a Computer. Computer won't start and give multiple sirens/beeps if it can't detect a RAM. Installing RAM is very easy. Here's how to install a RAM:

1. Push the two plastic hooks of the RAM slot on both sides to make space to insert the RAM.


2. Line up the RAM with the slot correctly so that the notch in the bottom of the RAM and the bar in the slot are aligned.

3. Insert the RAM in the slot and push it down until the two hooks from the sides come up and enter the two side notches of the Ram.

4. Push the two hooks in the notches firmly.


Installing a CPU Fan is complicated. I you can't attach it properly and it's loose then your PC will keep shutting down after you turn it on. Here is how to install a Processor Fan:


1. Grab the fan and put some thermal paste under the heat sink.

2. Put some thermal paste over the processor.

3. Turn the four black screws counter clockwise and pull them up.

4. Seat the Fan straight on the Processor port.

5. Insert the four plastic pins through the four holes on the Motherboard around the CPU port.

6. Push in the four screws in the holes and turn then clockwise.

7. Check if the fan is tight or not, If it's loose then attach the screws properly.

8. Connect the fan power cable to the appropriate Motherboard port beside the CPU port.


Installing a CPU in the Motherboard of your PC is quite easy. To insert a Processor you need to:

1. Open latch of the CPU socket to the side and pull the lid up.


2. Remove the Processor cover, grab it by its edge, avoid touching the pins.

3. Line up the CPU with the port correctly.

4. Gently insert the Processor into the port.

5. Close the lid and the latch.


Friday, January 16, 2015


Power Supply supplies electricity to a PC. To add a PSU with a computer you need to:


1. Remove the PSU cover.


2. Set the PSU in the case so that the screw holes of both the things are met properly (Usually at top).


3. Attach the PSU by adding the screws to the holes.


4. Grab the fat power cable and connect it to the motherboard's big main power port.


5. Grab the small 4 pin power cable and connect it to the power port beside the processor (CPU) port.


6. The other cables will be needed for optical and storage drives.


Friday, January 2, 2015


First step of building a PC is collecting the required parts. Here is what you need to assemble a desktop computer:-


1. Case - A case is needed to set all the devices of the computer in it.

2. Power Supply Unit (PSU) - To supply power to the devices of the computer we need a Power Supply. If you buy a case it will probably have a built in PSU in it. You can work with it with a less powerful PC. But for a much powerful PC you will have to buy a PSU of greater Watt.

3. Motherboard - Motherboard is the main circuit board of a computer which connects the other devices.


4. Processor (CPU) - The Central Processing Unit works as the brain of a computer. All the computations are done by it.


5. Random Access Memory (RAM) - RAM is used to temporarily store programs which are currently running.


6. Storage Devices - For storing data for a long time we need storage devices. We can either use Hard Disk Drive (HDD) or Solid State Drive (SSD).


7. Optical Disk Drive - CD, DVD or other optical devices are read or written by the optical disk drives.


8. Keyboard - Keyboard is used for giving input by typing.


9. Mouse - Mouse is needed for giving commands by clicking.


10. Printer - For printing documents.


11. Scanner - Used for scanning documents.


12. Graphics Card (GPU) - Graphical Processing Unit is needed for high quality graphical output.


13. Operating System Disk - You'll need an OS disk to install the Operating System which will run the computer.


14. Monitor - We can see graphical representation of our work in the monitor. There are many types of monitor. Most common are: CRT, LCD and LED.


15. Speaker - This is where we hear the sounds from.


This is almost everything you'll need to assemble a complete PC. There are some optional devices like Floppy disk, Sound Card, TV Card etc.


Wednesday, December 31, 2014


If your motherboard circuits got burned then there is no way you can fix it. But if a virus deletes your BIOS then your motherboard will stop working. There will be no POST operation. You'll get no display on your monitor screen. Your Processor fan will rotate but your computer won't start. Even if you remove your RAM there will be no siren or beep. So you can assume that your PC's BIOS has probably been corrupted. You can fix this problem by:


1. Find a motherboard that uses the same version BIOS (Take help from the manufacturer's website).

2. Remove your hard disk drive because it may contain the virus that caused the problem. Then Insert a good HDD that has a previously installed Operating System, good Antivirus and same version BIOS installer in it (Download the BIOS installer from the manufacturer's website).

3. Take the BIOS chip out of the bad motherboard (Use a screw driver or chip puller to do this).

4. Now take the BIOS chip out of the working motherboard and insert it into the bad motherboard (Don't press it too hard or else it will go in all the way. Softly connect the chip's connectors with the socket).

5. Boot the motherboard with the temporary new chip.

6. Now remove the temporary chip from the running motherboard (Use a screw driver or chip puller to do this).

7. Insert the bad BIOS chip into the socket.

8. Run the BIOS installer setup and install/flash the BIOS.

9. Restart/Reboot the computer.

10. If your PC Reboots then your motherboard is fixed.

11. Don't forget to put the working BIOS chip back to its own motherboard.

Conclusion: This is not for amateurs. Any mistake can damage an active motherboard. If you are not sure how to do this then get an expert or buy a new MOBO.